CyberSmarts for Seniors: Detailed Guide to Understanding Your Laptop Computer
 Admin
Admin 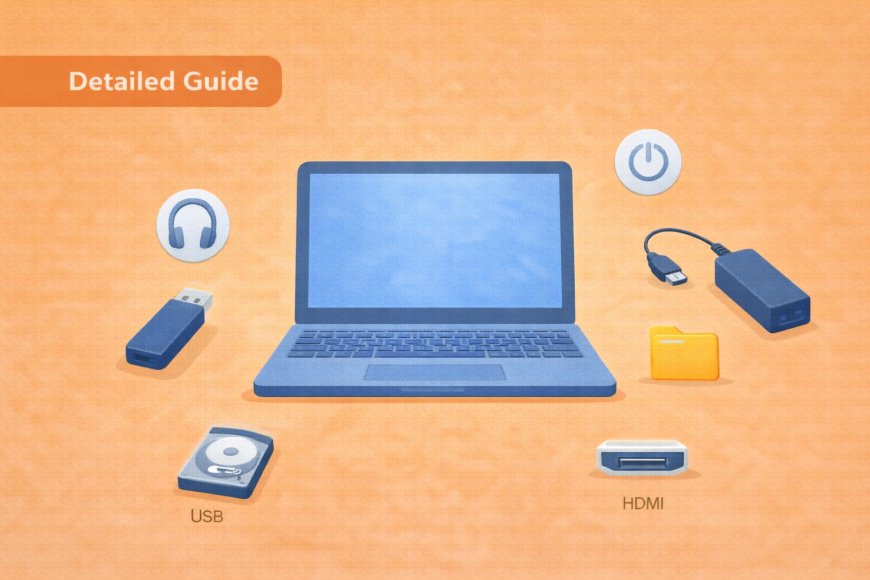
Whether you are new to using a laptop or just looking to feel more comfortable with one you already own, this guide walks you through everything you need to know at a pace that makes sense. Starting with the physical parts of the machine and building toward browsing the internet and communicating by email, each section gives you the practical knowledge to use your laptop independently and with confidence.
(A quick guide with the key points from this resource can also be downloaded as a PDF so you can read it anytime, even if you are offline. Click here to download your copy. )
What is a Laptop?
A laptop is a portable computer that combines all the essential parts of a desktop computer into one compact, foldable device. Think of it as having your entire office in a briefcase that you can take anywhere. Unlike desktop computers that have separate parts (monitor, keyboard, mouse, and tower), with laptops, everything is built into one unit.

Opening and Setting Up Your Laptop
Getting Started:
-
Place your laptop on a flat, stable surface like a table or desk
-
Locate the front edge of the laptop where the screen meets the base
-
Gently lift the screen using both hands - it should open smoothly like a book
-
Open it to a comfortable viewing angle (usually about 90-110 degrees)
-
If the screen is dark, look for the power button to turn it on

Finding the Power Button:
-
Usually located on the top-right corner of the keyboard area
-
Sometimes on the side of the laptop
-
Look for a circular button with a power symbol (⏻)
-
Press and hold for 2-3 seconds to turn on

External Hardware Components
The Screen (Display): Your laptop screen is like a television that shows everything happening on your computer. Modern laptops use LCD (Liquid Crystal Display) or LED (Light Emitting Diode) technology to create clear, bright images. The screen displays:
-
Text and documents you're reading or writing
-
Websites when browsing the internet
-
Photos and videos
-
Email messages and applications
The Keyboard: The keyboard is your main way to input letters, numbers, and commands. Canadian keyboards follow the QWERTY layout (named after the first six letters on the top row). Key features include:
-
Letter keys: For typing words and sentences
-
Number keys: Located along the top row (1-9, 0)
-
Space bar: The long key at the bottom for spaces between words
-
Enter key: Confirms commands or starts new lines
-
Shift key: Hold down to type capital letters
-
Backspace key: Deletes the character to the left of your cursor
-
Function keys (F1-F12): Special keys along the top for various functions
The Trackpad (Touchpad): Located below the keyboard, the trackpad is a smooth, rectangular surface that replaces a traditional mouse. It's pressure-sensitive and responds to finger movements:

-
Size: Usually about 4-6 inches wide and 2-3 inches tall
-
Surface: Smooth, slightly textured for finger grip
-
Sensitivity: Responds to light touch - no need to press hard
-
Click areas: The bottom portion can be pressed down like buttons
Ports and Connections Around Your Laptop
USB Ports: These rectangular slots are found on the sides of your laptop. USB stands for "Universal Serial Bus" and they're used to connect external devices:
-
What they look like: Rectangular openings about 1/2 inch wide
-
What you can connect: Computer mouse, keyboard, flash drives (memory sticks), printers, external hard drives
-
How many: Most laptops have 2-4 USB ports
-
Types: Some newer laptops have USB-C ports (smaller, oval-shaped)
Charging Port: This is where you plug in your power adapter to charge the battery:
-
Location: Usually on the side or back of the laptop
-
Shape: Round or rectangular, depending on your laptop brand
-
Importance: Keep your laptop charged so you can use it anywhere
Audio Jack (Headphone Port): A small, round hole for connecting headphones or external speakers:
-
Size: 3.5mm (about 1/8 inch) in diameter
-
Use: Plug in headphones for private listening or speakers for louder sound
-
Location: Usually on the side of the laptop
HDMI Port: Allows you to connect your laptop to a larger TV or monitor:
-
Shape: Flat, rectangular port
-
Use: Display your laptop screen on a bigger screen
-
Benefits: Great for watching videos on TV or giving presentations

Internal Components (What's Inside)
The Battery: Your laptop's battery is like the gas tank in a car - it stores power so you can use your laptop without plugging it into the wall:
-
Rechargeable: Automatically charges when plugged into power
-
Life span: Usually lasts 3-8 hours depending on usage
-
Indicator: Battery level shown on screen (usually in bottom-right corner)
-
Care tips: Don't let it drain completely; charge regularly
Hard Drive or SSD (Storage): This is your laptop's filing cabinet where everything is stored:
-
What it stores: All your photos, documents, emails, programs, and the operating system
-
Types: Traditional hard drives (HDD) or newer solid-state drives (SSD)
-
Capacity: Measured in gigabytes (GB) or terabytes (TB)
-
Think of it as: A huge digital filing cabinet that never loses your files
RAM (Random Access Memory): This is your laptop's short-term memory that helps programs run smoothly:
-
Function: Temporarily holds information that programs need right now
-
Why it matters: More RAM means your laptop can handle multiple tasks better
-
Analogy: Like your work desk - the bigger it is, the more projects you can spread out
Processor (CPU - Central Processing Unit): The "brain" of your laptop that processes all information and commands:
-
Function: Executes all the instructions from programs and the operating system
-
Speed: Measured in gigahertz (GHz)
-
Importance: A faster processor means your laptop responds more quickly
Mastering the Trackpad
Understanding Your Trackpad
The trackpad is your laptop's built-in mouse replacement. It's a touch-sensitive surface that translates your finger movements into cursor movements on the screen.
Physical Features:
-
Surface: Smooth, slightly textured rectangle below your keyboard
-
Size: Typically 4-6 inches wide, 2-3 inches tall
-
Click mechanism: The bottom portion can be physically pressed down
-
Some trackpads: Have visible left and right click buttons at the bottom

Basic Trackpad Operations
Moving the Cursor:
-
Place one finger lightly on the trackpad surface
-
Glide your finger smoothly across the surface
-
Watch as the arrow (cursor) on your screen follows your finger movement
-
Lift your finger to stop the cursor
Important Tips:
-
Use light pressure - don't press hard
-
Keep your finger in contact with the surface while moving
-
Rest your palm on the laptop, not on the trackpad
-
Clean, dry fingers work best
Single Clicking (Left Click): This is the most common action - like pointing and selecting something:
Method 1 - Tapping:
-
Position the cursor over what you want to select
-
Quickly tap once with one finger on the trackpad
-
Lift your finger immediately
Method 2 - Pressing:
-
Position the cursor over your target
-
Press down on the bottom-left area of the trackpad until you hear/feel a click
-
Release immediately
What Single Clicking Does:
-
Selects text or objects
-
Activates buttons on websites
-
Places your cursor in text fields
-
Opens menus
Double Clicking: Used to open files, folders, or programs:
-
Position the cursor over the item you want to open
-
Quickly tap twice in the same spot
-
Keep the taps close together in time (within about 1 second)
-
If it doesn't work, try again with faster taps

Right Clicking: Opens context menus with additional options:
Method 1 - Two-finger tap:
-
Position the cursor over your target
-
Tap once with two fingers simultaneously
-
A menu will appear with various options
Method 2 - Bottom-right click:
-
Position the cursor over your target
-
Press down on the bottom-right corner of the trackpad
-
A context menu will appear
What Right Clicking Shows:
-
Copy and paste options
-
Delete or rename options
-
Properties or settings
-
Additional actions specific to what you clicked on
Advanced Trackpad Gestures
Two-Finger Scrolling: Navigate up and down on web pages or documents:
-
Place two fingers on the trackpad
-
Keep them about 1/2 inch apart
-
Move both fingers up to scroll down on the page
-
Move both fingers down to scroll up on the page
-
Move fingers left or right to scroll sideways

Pinch to Zoom: Make text and images larger or smaller:
-
Place two fingers on the trackpad, close together
-
To zoom in (make bigger): Slowly move your fingers apart
-
To zoom out (make smaller): Slowly move your fingers together
-
Works on websites, photos, and documents
Three-Finger Swipe: Switch between open programs (varies by laptop):
-
Place three fingers on the trackpad
-
Swipe left or right to switch between open applications
-
This gesture may need to be enabled in your settings
Trackpad Settings and Customisation
Accessing Trackpad Settings:
On Windows:
-
Click the Start button (Windows logo in bottom-left)
-
Type "Mouse settings" and press Enter
-
Look for "Touchpad" options
-
Adjust sensitivity, gestures, and clicking preferences
On Mac:
-
Click the Apple menu (top-left corner)
-
Select "System Preferences"
-
Click "Trackpad"
-
Adjust tracking speed, gestures, and clicking options
Common Adjustments:
-
Sensitivity: How fast the cursor moves
-
Click pressure: How hard you need to press
-
Gesture enable/disable: Turn specific gestures on or off
-
Palm rejection: Prevents accidental touches while typing
Using an External Mouse
If the trackpad feels challenging, an external mouse is an excellent alternative:
Types of Mice:
-
Wired mouse: Plugs into USB port, always works
-
Wireless mouse: Uses batteries, connects via USB receiver or Bluetooth
-
Optical mouse: Works on most surfaces, has LED light underneath
-
Laser mouse: More precise, works on more surfaces
Mouse Components:
-
Left button: Primary clicking (same as single tap on trackpad)
-
Right button: Context menus (same as right-click on trackpad)
-
Scroll wheel: Roll up/down to scroll pages, can also be clicked
-
Body: Hold comfortably in your palm
Setting Up an External Mouse:
-
For wired: Plug USB connector into any USB port on your laptop
-
For wireless: Insert USB receiver into USB port, turn mouse on
-
The cursor should start moving when you move the mouse
-
Most mice work immediately without additional setup
Using Your Laptop for Communication
The Simple Power of the internet
So you've covered a lot of ground: you've learned the basics about your devices, you've explored operating systems and apps or programs, and you've discovered how to open them. You know what a browser looks like, and you've navigated to some sites and done some searches. Now take things up a notch. It's time to learn how to use your device to reach out to and communicate with the world via email.
Email has largely replaced traditional mail for everyday written communication, and for good reason. Before looking at the specific features, it helps to understand why so many people rely on it as their primary way of staying in touch. The advantages below explain why learning email is worth the effort.
Email: Your Digital Post Office
Understanding Email Fundamentals
Email (electronic mail) is like the postal service, but instead of physical letters delivered to your mailbox, digital messages are delivered instantly to a person's email inbox through the internet.
Key Benefits of Email:
-
Free: No cost to send or receive emails anywhere in the world
-
Instant: Messages arrive within seconds
-
Permanent record: Keeps copies of all your conversations
-
Multiple recipients: Send the same message to many people at once
-
Attachments: Include photos, documents, or other files
-
Available 24/7: Check and send emails anytime, day or night
When to Use Email vs. Other Communication:
-
Email is great for: Sending documents, formal communication, keeping records, reaching people in different time zones
-
Phone calls are better for: Urgent matters, complex discussions, when you need immediate response
-
Text messages work for: Very short, casual messages, quick confirmations
Understanding Email Addresses
At first glance, an email address can look like a random string of characters, but it follows a consistent, logical pattern. Understanding the two parts of an address makes it much easier to read, remember, and type your own correctly. The breakdown below applies to every email address you'll ever encounter.

Every email address has two parts separated by the @ symbol (pronounced "at"):
Format: username@domain.com
Examples:
-
john.smith@gmail.com
-
mary_johnson123@outlook.com
-
info@canadapost.ca
Breaking Down an Email Address:
Username (before @):
-
Your chosen name or identifier
-
Can include letters, numbers, periods, and underscores
-
Cannot have spaces
-
Examples: john.smith, mjohnson, user123
Domain (after @):
-
The email service provider
-
Tells the system where to deliver your email
-
Common Canadian and international providers
Popular Email Service Providers
Choosing an email provider is a bit like choosing a bank. They all perform the same core function, but each has slightly different features and a different look. The options below are all reputable, free, and widely used in Canada.
Gmail (by Google):
-
Website: gmail.com
-
Most popular worldwide
-
Includes 15GB free storage
-
Integrates with other Google services
Outlook (by Microsoft):
-
Website: outlook.com
-
Previously called Hotmail
-
Integrates with Microsoft Office programs
-
Clean, professional interface
Yahoo Mail:
-
Website: mail.yahoo.com
-
One of the oldest email services
-
Includes news and weather updates
-
Large attachment support
Apple Mail (iCloud):
-
Website: icloud.com
-
Best for Apple device users (iPhone, iPad, Mac)
-
Syncs across all your Apple devices
-
Address ends in @icloud.com
Three Ways to Access Your Email
Method 1: Web Browser (Recommended for Beginners)
This method works on any computer with internet access. For anyone just starting out with email, accessing it through a web browser is the most straightforward approach because it requires no setup and works on any computer. You simply go to a website, sign in, and your inbox is right there. The steps below walk you through the process from start to finish.
-
Open your web browser (Chrome, Safari, Firefox, or Edge)
-
In the address bar, type your email provider's website:
-
Gmail: gmail.com
-
Outlook: outlook.com
-
Yahoo: mail.yahoo.com
-
Click "Sign In" or "Log In" (or "Register" or "Sign up" if you don't already have an account)
-
Enter your full email address (or complete the steps to register)
-
Enter your password
-
Click "Sign In"
Advantages:
-
Works on any computer
-
Always shows the latest version
-
No software to install or update
-
Same experience everywhere
Method 2: Email App on Phone or Tablet
Most smartphones and tablets come with built-in email apps. If you use a smartphone or tablet, you may already have an email app installed without realizing it. Apps make checking email very convenient because your messages are always one tap away. The setup process is a one-time task, and the app handles everything automatically after that.
iPhone/iPad:
-
Built-in "Mail" app (blue envelope icon)
-
Can also download Gmail, Outlook, or Yahoo apps from App Store
Android Phones:
-
Usually comes with Gmail app pre-installed
-
Can download other email apps from Google Play Store
Setting up:
-
Open the email app
-
Choose "Add Account" or "Set Up Email"
-
Select your email provider (Gmail, Outlook, etc.)
-
Enter your email address and password
-
The app will configure everything automatically
Method 3: Computer Email Program Built-in programs on your laptop for managing email:
Some people prefer having a dedicated program on their computer for managing email, separate from their web browser. This approach works well if you use the same computer regularly and want quick access without opening a browser first. The steps below are similar for both Windows and Mac computers.
Windows Computers:
-
Microsoft Outlook (full version)
-
Windows Mail app (simpler version)
Mac Computers:
-
Apple Mail (built-in)
Setting up:
-
Open the email program
-
Choose "Add Account"
-
Select your email provider
-
Enter your email address and password
-
The program will download your emails
Navigating Your Email Interface
When you first log into your email, the left side of the screen shows a list of folders, each with a specific purpose. Understanding what each folder is for prevents confusion and helps you stay organized from the start. The folders below are standard across virtually all email providers, though the names may vary slightly.
Once you're logged into your email, you'll see several important sections:
Inbox:
-
Where all new emails arrive
-
Like your home mailbox where mail is delivered
-
New emails are usually shown in bold text
-
Number next to "Inbox" shows how many unread emails you have
Sent:
-
Copies of all emails you've sent to others
-
Helpful for remembering what you told someone
-
Organised by date, newest first
Drafts:
-
Emails you started writing but haven't sent yet
-
Like letters you wrote but left on your desk
-
Automatically saves your work so you don't lose it
-
Can finish and send later
Deleted Items/Trash:
-
Emails you deleted
-
Items stay here for about 30 days before permanent deletion
-
Can recover accidentally deleted emails
-
Empty trash to permanently delete everything
Other Folders (may include):
-
Spam/Junk: Suspicious or unwanted emails automatically filtered
-
Important: Emails marked as high priority
-
Archive: Old emails you want to keep but remove from the Inbox

Reading and Managing Emails
Your inbox uses a few simple visual signals to show you which emails you've already seen and which ones still need your attention. These cues are consistent across most email providers, so learning them once applies everywhere. A quick glance at these signals tells you exactly where things stand.
Identifying New vs. Read Emails:
-
New emails: Appear in bold text, often with a blue dot or highlighting
-
Read emails: Normal text, no highlighting
-
Replied emails: May show a small arrow indicating you responded
Opening and Reading Emails:
Opening an email is straightforward, but knowing what each part of the message means helps you process it efficiently. Every email follows the same basic layout regardless of who sent it or which provider you use. The components below are what you'll see every time.
-
Click once on any email in your inbox
-
The email will open, showing:
-
From: Who sent it
-
To: Who received it (you and possibly others)
-
Subject: What the email is about
-
Date/Time: When it was sent
-
Message: The actual content
Email Threads (Conversations):
When you and someone else exchange several replies on the same topic, most email providers group those messages together automatically. This grouping, called a thread or conversation, keeps related messages in one place so you don't have to search for earlier parts of the exchange. It takes a moment to get used to, but most people find it much easier than hunting through individual messages.
When people reply back and forth, emails stay grouped together:
-
Shows the entire conversation in one place
-
Newest messages appear at the top or bottom
-
Each message shows who sent it and when
-
Makes it easy to follow the discussion
Marking Emails:
Beyond simply reading and deleting emails, most providers give you a few simple tools for keeping your inbox organized. These options are helpful once your inbox starts filling up and you need a reliable way to flag things for follow-up. None of them are required, but even using one or two makes a noticeable difference.
-
Mark as unread: Makes it bold again so you remember to respond
-
Flag/Star: Mark important emails for easy finding later
-
Archive: Remove from inbox but keep for reference
Writing and Sending Your First Email
Starting a New Email:
-
Look for a button labeled "Compose," "New," or "Write"
-
Common icons: ✏️ (pencil), ➕ (plus sign), or a notepad icon
-
Click the button to open a new email window
The Three Essential Parts:
1. TO Field (Recipients):
-
Click in the box labeled "To:"
-
Type the complete email address of the person you're writing to
-
Example: friend@gmail.com
-
For multiple people: Type first address, press comma, add next address
-
Double-check spelling - incorrect addresses won't receive your email
2. Subject Line:
-
Click in the box labeled "Subject:"
-
Write a brief description of your email's purpose
-
Keep it clear and specific
-
Good examples:
-
"Hello from Sarah"
-
"Question about dinner plans"
-
"Thank you for your help"
-
Avoid: Empty subjects, all capitals, or vague words like "Hi"
3. Message Body: This is where you write your actual message:
Start with a greeting:
-
"Hello [Name],"
-
"Hi there,"
-
"Dear [Name],"
Write your message:
-
Be clear and friendly
-
Use proper sentences
-
Check your spelling
-
Keep it concise but complete
End with a closing:
-
"Best regards, [Your name]"
-
"Sincerely, [Your name]"
-
"Talk soon, [Your name]"
Sample Email Template:
To: friend@example.com
Subject: Hello from my first email!
Hello Mary,
I hope you're having a wonderful day! I'm practising sending emails on my laptop and thought I'd write to you.
The weather has been lovely here in [your city]. How are things with you?
I'd love to hear back from you when you have a chance.
Best regards,
[Your name]
Reviewing Before Sending: Before clicking "Send," always check:
-
Recipient: Is the email address correct?
-
Subject: Does it clearly describe your message?
-
Message: Read through for spelling and clarity
-
Tone: Does it sound friendly and appropriate?
-
Completeness: Did you include everything you wanted to say?
Sending Your Email:
-
Click the "Send" button (usually blue and prominent)
-
The email will disappear from your draft
-
You'll usually see a confirmation like "Message sent"
-
A copy automatically goes to your "Sent" folder
Email Etiquette and Best Practices
Writing Professional Emails:
-
Always include a clear subject line
-
Start with an appropriate greeting
-
Use proper spelling and grammar
-
Keep messages concise but complete
-
End with a polite closing and your name
Safety and Privacy:
-
Never share personal information like passwords or SIN numbers
-
Be cautious with emails from unknown senders
-
Don't click suspicious links or download unexpected attachments
-
Verify requests for money or personal information by calling the person
Managing Your Inbox:
-
Check email regularly but not obsessively
-
Delete emails you no longer need
-
Organise important emails into folders
-
Keep your inbox manageable - don't let it get overwhelming
Troubleshooting Common Issues
Password Problems
If You Forget Your Password:
-
Look for "Forgot Password" or "Reset Password" link on the sign-in page
-
Click the link and enter your email address
-
Check your phone for a security code (text message)
-
Follow the instructions to create a new password
-
Write down your new password and keep it in a safe place
Creating Strong Passwords:
-
Use at least 8 characters
-
Include numbers and letters
-
Avoid using personal information like birthdays
-
Consider using a password manager app
-
Don't use the same password for multiple accounts
Technical Difficulties
If Your Email Won't Load:
-
Check your internet connection
-
Try refreshing the page (press F5 or click refresh button)
-
Clear your browser cache (ask for help with this)
-
Try using a different web browser
-
Restart your laptop and try again
If Emails Won't Send:
-
Check the recipient's email address for typos
-
Make sure you're connected to the internet
-
Try sending a test email to yourself
-
Check if your outbox shows any stuck emails
-
Sign out and sign back into your email account
If Text Appears Too Small:
-
Hold down the "Ctrl" key and press the "+" key to zoom in
-
Hold down the "Ctrl" key and press the "-" key to zoom out
-
Hold down the "Ctrl" key and press "0" to return to normal size
Getting Help
When You Need Assistance:
-
Ask family members or friends who use computers
-
Visit your local library - many offer computer help
-
Look for senior-friendly computer classes in your community
-
Contact the email provider's customer support (usually available online)
-
Consider hiring a patient tutor for one-on-one help
Building Confidence:
-
Remember that everyone makes mistakes when learning
-
Take your time - there's no rush
-
Practice a little bit each day
-
Don't be afraid to explore and try new things
-
Celebrate small victories - each step forward is progress!
Practice Exercises
Daily Practice Suggestions
Week 1 Focus: Hardware Familiarity
-
Practice opening and closing your laptop properly
-
Locate and identify all the ports and buttons
-
Practice turning your laptop on and off safely
-
Get comfortable with trackpad movements
Week 2 Focus: Trackpad Mastery
-
Spend 10 minutes daily moving the cursor around the screen
-
Practice single-clicking on different items
-
Try right-clicking to explore menus
-
Attempt double-clicking to open files or programs
Week 3 Focus: Email Basics
-
Log into your email account daily
-
Read any new emails you receive
-
Practice writing emails to yourself
-
Send one email to a family member or friend
Week 4 Focus: Building Confidence
-
Combine all skills: use trackpad to navigate and send emails
-
Try exploring other features you discover
-
Ask questions when you encounter something new
-
Help another person with what you've learned
Suggested Practice Activities
-
Send a weekly email to a family member sharing what you did that week
-
Create a simple document using a word processing program
-
Browse the internet to look up information about your hobbies
-
Watch tutorial videos on YouTube about computer skills
-
Join online communities related to your interests
Remember: Learning technology is like learning to drive or cook - it takes practice, patience, and time. Every expert was once a beginner. Be kind to yourself, celebrate your progress, and don't hesitate to ask for help when you need it.
.
Return to the CyberSmarts for Seniors Introduction:
CyberSmarts for Seniors: Practical Lessons to Build Digital Confidence and Safety
.

This resource is part of the CyberSmarts for Seniors Project, funded in part by the Government of Canada’s
New Horizons for Seniors Program and ELNOS, and delivered in Elliot Lake by Raknas Inc. and Golden Voices, the seniors-focused division of the DiversityCanada Foundation.
.
Download PDF
How to download a quick guide with the key points of this article as a PDF:
—Click the File Name below (in blue).
— If your device is set up to download automatically, the file you just clicked will be saved where your downloaded items can be found (usually in your Downloads folder or Desktop).
—If your device is not set up to download automatically, a dialogue box should pop up.
—Click Save.
—According to your device settings, the file may now be saved where your downloaded items can be found (usually in your Downloads folder or Desktop).
—Alternatively, your device may show you a window, and you will have the chance to choose a location where you want to save the file. Choose a place that's easy to find, like Downloads, Documents, or Desktop.
—The PDF will be downloaded to your device.
—You can now open it anytime in the future, even without an Internet connection.