CyberSmarts for Seniors: Detailed Photo, File & Cloud Storage Guide
 Admin
Admin 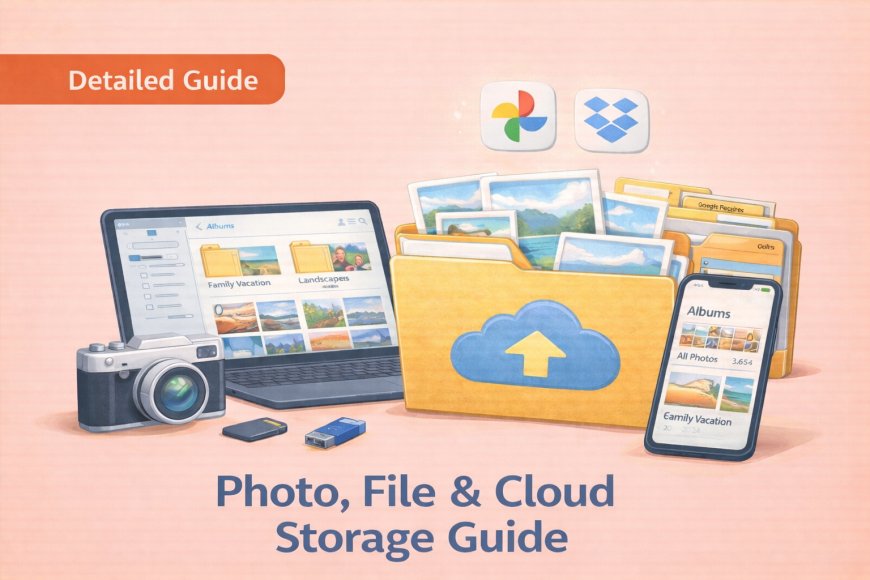
Managing your digital life doesn't have to feel overwhelming. With a little guidance, it becomes as natural as tidying a familiar room. This guide walks you through three connected skills: organizing your photos, structuring your documents, and using cloud storage to keep everything safe and accessible. Take it one section at a time, and you'll soon find that looking after your digital memories and important files is well within your reach.
(A quick guide with the key points from this resource can also be downloaded as a PDF so you can read it anytime, even if you are offline. Click here to download your copy.)
1. PHOTO MANAGEMENT – ORGANIZE YOUR MEMORIES
As you use it, your phone or tablet is quietly collecting hundreds of photos, and without some simple organization, finding a cherished picture of your grandchildren can feel like searching for a needle in a haystack. The good news is that both iPhones and Android devices have built-in tools that make sorting your photos straightforward — no technical background required. A few minutes of setup now will save you real frustration later and ensure your favourite memories are always easy to find.

It is important to organize your photos so that memories, like your grandchildren's pictures, are not lost among thousands of random images.
Understanding Your Photos App (iPhone/iPad)
When you open your Photos app (the colourful flower icon), look at the four tabs at the bottom:
-
Photos: This shows everything you have ever taken, usually in chronological order.
-
For You: Contains Apple's suggestions, featured photos, and shared albums.
-
Albums: This is where the magic happens; it contains your organized collections.
-
Search: This is powerful; you can type words like "dog" or "beach," and the app will find related photos.

Step-by-Step: Creating an Album (iPhone/iPad)
-
Tap 'Albums' at the bottom.
-
Tap the small plus sign (+) in the top left corner.
-
Choose 'New Album'.
-
Type a descriptive name, such as "Grandchildren" or "Family Vacation 2024".
-
Select the photos you want to add (you will see blue checkmarks appear).
-
Tap 'Create' or 'Done' when finished.
Step-by-Step: Adding Photos to Existing Albums (iPhone/iPad)
-
Go back to the 'Photos' tab.
-
Tap 'Select' in the top right corner.
-
Tap the photos you wish to add (blue checkmarks will appear).
-
Tap 'Add To' at the bottom.
-
Choose the existing album you want (e.g., your "Grandchildren" album).
-
Tap 'Done'.
Step-by-Step: Creating Albums on Android (Google Photos)
The concept is the same as the iPhone, but the buttons are in different places. Google Photos looks like a colourful pinwheel.
-
Open the Google Photos app.
-
Tap 'Library' at the bottom, then tap 'Albums'.
-
Tap 'Create album' (usually located at the top).
-
Name your album.
-
Select photos to add by tapping them.
-
Tap 'Done' when finished.

Managing Photos on Your Laptop or Desktop
This method is especially useful when organizing hundreds of photos at once.
|
Platform |
Action |
Steps |
|
Windows |
File Explorer Method |
1. Press the Windows key and E at the same time to open File Explorer. 2. Click 'Pictures' on the left sidebar. 3. Create a new folder by right-clicking in empty space and choosing 'New Folder'. 4. Name folders descriptively, like '2024 Family Reunion'. |
|
Mac |
Finder Method |
1. Click the Finder icon (blue and white face). 2. Click 'Pictures' on the left. 3. To make a new folder, press Command + Shift + N together, or go to File menu → New Folder. 4. Organize photos by dragging them between folders. |
2. FILE ORGANIZATION – CREATING YOUR DIGITAL FILING SYSTEM
Think of the documents on your computer the way you'd think of paper piling up on a kitchen counter. They may be manageable at first, but quickly become chaotic without a system. Organizing your documents, receipts, warranties, and medical records can seem like a challenge. But, once you have a plan and get started, creating a simple folder structure takes only minutes, and once it's in place, finding your insurance papers, medical records, or a favourite recipe becomes effortless. The steps below will help you build a personal filing system that suits the way you already think.
The Filing Cabinet Analogy
Think of your computer like a physical filing cabinet:
-
Files are individual pieces of paper (like a recipe or a doctor's bill).
-
Folders are like the drawers in your filing cabinet.
-
Subfolders are like dividers within those drawers.
The goal is to create a system that makes sense to you.
Step-by-Step: Setting Up Your Master Folder Structure
We recommend creating a master filing system in your main Documents folder.
On Windows
-
Press Windows key and E to open File Explorer.
-
Click 'Documents' on the left side.
-
Right-click in the empty space, choose 'New', then 'Folder'.
-
You can name a master folder 'Important Documents'.
-
Inside your Documents or Important Documents folder, create these essential folders:
-
Medical Records
-
Financial Documents
-
Family Photos
-
Recipes
-
Warranties & Manuals
-
Travel Documents
-
Downloads to Sort

On Mac
-
Open Finder (the blue and white face icon).
-
Click 'Documents' on the left sidebar.
-
Press Command + Shift + N together, or go to File menu → New Folder.
-
Create the same essential folders listed above.
Creating Subfolders
Subfolders help organize files within a main category, making your system really useful.
-
Double-click your main folder (e.g., "Medical Records").
-
Right-click inside the folder.
-
Choose 'New Folder'.
-
Name it descriptively, such as 'Dr. Johnson - Family Doctor' or 'Insurance Papers'.
-
Repeat this process for each type of record you have.
File Naming Best Practices
Using good file names saves hours of searching. Avoid vague names like "Document1" or "Untitled".
|
Good Examples (Descriptive) |
Bad Examples (Vague) |
|
Insurance_Policy_Auto_2024 |
Document1 |
|
Recipe_Chocolate_Chip_Cookies_Grandma |
Untitled |
|
Warranty_Refrigerator_Purchase_2023 |
New Document |
Tip: Use underscores (like this: _) instead of spaces when naming files, as this helps prevent problems when sharing files later.

Managing Your Downloads Folder
Your Downloads folder gets messy fast, like a kitchen counter. You should clean it weekly:
-
Open your Downloads folder.
-
Sort by date, with the newest files listed first.
-
Move important files (like tickets or documents) to their proper folders (e.g., 'Travel Documents').
-
Delete the junk (like old installers and temporary files).
3. CLOUD STORAGE & SYNCING – ACCESS YOUR FILES ANYWHERE
What is Cloud Storage?
If you've ever worried about losing precious photos because your phone was lost or broken, cloud storage is the solution that will put your mind at ease. It works quietly in the background, automatically keeping copies of your files safe on secure internet servers — no technical expertise needed to benefit from it. Once set up, you'll be able to reach your photos and documents from any device, anywhere, just as easily as checking your email.
Cloud storage sounds complex, but it is simple. Think of it as a digital safety deposit box: your photos and documents are stored on secure internet servers. You can access this digital safe deposit box from anywhere in the world using any internet-connected device.

Benefits of Using the Cloud
There are five practical reasons why cloud storage makes your life easier:
-
Automatic Backup Protection: If your phone is lost, stolen, or breaks, all your photos and files remain safe and accessible in the cloud.
-
Access Anywhere: You can view the same files and photos on your phone, computer, or tablet. For example, a photo taken on your phone will automatically appear on your computer at home.
-
Extra Storage Space: If your phone warns you that storage is full, the cloud provides room for thousands more photos.
-
Easy Sharing: You can share entire photo albums instantly with family instead of emailing photos one by one.
-
Convenience While Travelling: You can access all your documents from any internet connection when on vacation or visiting family.

Google Drive Setup (Recommended)
We recommend Google Drive because it is beginner-friendly and works across all devices (iPhones, Androids, Macs, Windows).
Setting Up on Your Smartphone
-
Download the app:
-
iPhone: Find the blue App Store icon, tap search, type 'Google Drive', and tap the blue 'GET' button.
-
Android: Find the Google Play Store icon, tap the search bar, type 'Google Drive', and tap 'Install'.
-
Sign In: Open the app, tap the blue 'Sign In' button, and enter your Gmail email address and password.
Setting Up Automatic Photo Backup (Using Google Photos)

You need a separate app called Google Photos to set up automatic backup.
-
Download Google Photos (from the App Store or Google Play Store).
-
Open Google Photos (the colourful pinwheel icon).
-
Tap your profile picture in the top right corner.
-
Tap 'Photos settings'.
-
Tap 'Backup' or 'Backup & sync'.
-
Toggle the switch to ON.
-
Choose 'Storage saver'—this keeps excellent quality photos and is completely free, providing you with 15GB of storage.
Connecting Your Computer
-
On your computer, open your internet browser (Chrome, Safari, or Edge).
-
In the address bar, type: drive.google.com.
-
Sign in with the SAME Google account you used on your phone.
-
You will now see the same files on both devices.
Tip: To upload files from your computer, open drive.google.com, click the 'New' button (+ symbol), and choose 'File upload' or 'Folder upload'.
Alternative Cloud Setups
|
Service |
Best For |
Setup Instructions |
|
iCloud |
All-Apple users (iPhone, Mac) |
Phone: Go to Settings app → tap your name at the top → iCloud → turn on Photos and iCloud Drive. Mac: Go to Apple menu → System Preferences → Apple ID → iCloud → check Photos and iCloud Drive. |
|
OneDrive |
Windows users |
Windows PC: Click the Start button → type 'OneDrive' → sign in with your Microsoft account → choose what to sync. Phone: Download the OneDrive app, sign in with the same Microsoft account, and enable camera upload. |
Note: iCloud and OneDrive only offer 5 GB of free storage, compared to Google's 15 GB.
4. SHARING FILES & PHOTOS
Sharing a beautiful family photo or an important document with a loved one should be simple, and with today's tools, it genuinely is. Whether you're sending a single snapshot by email or sharing an entire holiday album with relatives across the country, there's a method here that will work for you. The options below range from the familiar to the surprisingly quick, so you can choose whatever feels most comfortable.
Email Sharing Method
This is the most universal method, but it has limits.
-
Open your email app and tap 'Compose' or 'New Email'.
-
Look for the paperclip icon (?) or 'Attach' button.
-
Choose 'Photo Library' or 'Camera Roll'.
-
Select your photos.
-
Important Limitation: Most email services allow only about 25MB of attachments, which is only about 5–7 high-quality photos. For larger batches, use cloud sharing.
Cloud Service Sharing (The Game-Changer)
Cloud sharing allows you to share hundreds of photos instantly in an organized format.

Google Drive Sharing Steps:
-
Open the Google Drive app on your phone or website.
-
Find a folder or file you want to share.
-
Tap the three dots (⋮) next to the file or folder.
-
Tap 'Share'.
-
Choose a method:
-
"Add people": Type their email address for private sharing.
-
"Copy link": Share the link via text or email.
-
Set Permissions (Crucial): You control what the recipient can do:
-
Viewer: They can only look at the photos or files; they cannot change or delete anything. This is usually what you want for family photos.
-
Editor: They can add photos or make changes.
-
Commenter: They can look and add comments (for documents).
AirDrop (Apple Users Only)
AirDrop is an instant sharing superpower for sending photos, videos, and documents wirelessly between nearby Apple devices (iPhone, iPad, Mac) without needing the internet.
-
Setup: Swipe down from the top-right corner of your iPhone to open the Control Center. Press and hold the network settings box, tap 'AirDrop', and choose 'Contacts Only' for security.
-
Sharing: Open the Photos app → Select the photos you want to share → Tap the Share button (the box with an arrow icon). Under AirDrop, you will see nearby Apple devices; tap the person's name to send instantly.

TIPS FOR SUCCESS AND TROUBLESHOOTING
Key Practice Tips
-
Pacing: Do not try to remember everything today.
-
Practice: Take this reference sheet home and practice one small step at a time. Age is not a barrier; practice is the key.
-
Security: Cloud storage (like Google Drive) is often more secure than only keeping files on your phone, because if your phone is lost or stolen, your memories are safe in the cloud.
-
Cost: Everything we covered today (Google Drive/Photos free tier) is completely free.
Troubleshooting Quick Fixes
|
Issue |
Solution |
|
General issue/App acting strangely |
Try turning the app or the device off and on again. |
|
Photos won't sync |
1. Check your Wi-Fi or internet connection. 2. Verify your Backup settings (ensure the switch is ON). 3. Check if your Cloud storage is full. |
|
Can't find a file |
1. Check your Downloads Folder first. 2. Use the Search Function (Windows Start/Mac Spotlight). 3. Check the Recent Files section of your apps. 4. Check the cloud services (Google Drive, iCloud, OneDrive), as the file might be there instead of on the device. |
|
Accidentally deleted something |
Photos: Check the Recently Deleted folder (iPhone Photos app) or the Trash (Google Photos app). Files stay here for 30 days. Files: Check the Recycle Bin (Windows) or Trash (Mac/Cloud service). |
|
Can't sign in/access files |
Make sure you are signed into the SAME Google/Apple/Microsoft account on all your devices. |
.
.
Return to the CyberSmarts for Seniors Introduction:
CyberSmarts for Seniors: Practical Lessons to Build Digital Confidence and Safety
.
.

This resource is part of the CyberSmarts for Seniors Project, funded in part by the Government of Canada’s
New Horizons for Seniors Program and ELNOS, and delivered in Elliot Lake by Raknas Inc. and Golden Voices, the seniors-focused division of the DiversityCanada Foundation.
.
.
Download PDF
How to download a quick guide with the key points of this article as a PDF:
—Click the File Name below (in blue).
— If your device is set up to download automatically, the file you just clicked will be saved where your downloaded items can be found (usually in your Downloads folder or Desktop).
—If your device is not set up to download automatically, a dialogue box should pop up.
—Click Save.
—According to your device settings, the file may now be saved where your downloaded items can be found (usually in your Downloads folder or Desktop).
—Alternatively, your device may show you a window, and you will have the chance to choose a location where you want to save the file. Choose a place that's easy to find, like Downloads, Documents, or Desktop.
—The PDF will be downloaded to your device.
—You can now open it anytime in the future, even without an Internet connection.